How to create a perfect passport photo like a pro?
How to create a perfect passport photo like a pro:
Yes!, You can do it with ease, Having a powerful smartphone or DSLR camera is most common in any household which is the main accessory to start with. Having some basic photography skills will help but wouldn't limit you to achieving a perfect photo. The final important thing to achieve government application photo requirements by using a perfect cropping tool. Will cover some of the important steps to follow on each of these topics below.
Taking a perfect picture.
- Camera: While a smartphone is more than enough to achieve a good quality photo, a DSLR camera would be a better option if available. A DSLR camera is designed to work in low light and capture more details.
- Light: Pick a room that has more sunlight, This will help in increasing the lighting conditions of the environment for a good photo without any shadows. So the point is preferred day than night for taking a picture. In addition to sunlight, you can also use some of the Led daylight (5k) bulbs to achieve balance from sunlight.
- Background: White background is always better, but it is hard to achieve a perfect white without proper lighting no matter you use a white cloth or a white foam board unless if you want to invest more. But don't worry most of the countries do accept a plain background as well, so choose a wall with a plain background.
- Distance: Set up your camera from 4ft - 6ft where you are planning to stand, also do not stand so close to the wall to avoid body shadows in the background. Do not use digital zoom at all, only optical zoom for better quality.
- Appearance: Cover half or more body in the picture, keep in mind that you do not want the crop the photo to passport photo size while taking the picture itself? You will leave that job to the cropping tool.
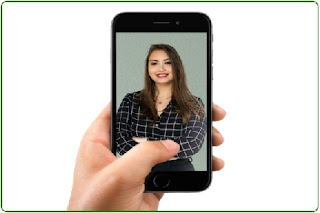
- Clicks: Have someone else take your photo. Selfies are not good. Get a couple of photos in hand before you try to crop so that you will have an option to choose the best one among them.
Cropping & Edit tools:
This is an important step that crops the photo per the requirement, As there are many tools available choosing the right tool is key., Do not use multiple tools to achieve the desired photo as it degrades the photo quality and makes the photo lose the biometrics that is required by some of the authorities/agencies. Also, do not alter or retouch the photo.
There are two ways to crop a photo, one is manual which the user manually maps the face with help of a crop frame and the latest one is automatic which based on artificial intelligence.
In this article, we will talk more about using the simple tool freepassphoto.com which automatically crops and adds the white background in three simple steps.
Upload your photo:
Select the required size and upload the photo to the website, it processes and presents the preview screen.
Verify Cropped Photo:
- Verify the photo in the preview section and make sure it meets the official requirements of the application. The preview has a grid line scale in centimeters, which will help in measuring the head size, physical dimensions, etc, without actually printing it.
- Download & Print:

- Download the photo from the website and print it yourself at any drug store/grocery store kiosk for a small price.
Comments
Post a Comment